In materials science and engineering, hardness testing is crucial for evaluating a material’s resistance to deformation, which directly impacts its durability, wear resistance, and performance across various applications. Understanding a material’s hardness is essential for determining its suitability for specific tasks.
The most frequently referenced hardness tests in material datasheets are Rockwell, Brinell, and Vickers, with Rockwell being the most prevalent due to its quick and straightforward process, especially in industrial settings. Leeb, and Knoop hardness tests have specialised uses and are less commonly cited in standard material datasheets due to their specific applications and testing environments.

Comparison of Hardness Testing Methods
Below is a quick reference chart comparing the different hardness test methods in terms of suitable materials, advantages and disadvantages, applications, load range, indentation type and applicable standards.
| Hardness Test | Suitable Materials | Advantages | Disadvantages | Applications | Load Range (kgf*) | Indentation Type | Standards |
| Rockwell C (HRC) | Metals, Alloys | Quick, easy to use, widely recognized | Limited precision on thin materials | Quality control, bulk material testing | 60-150 kgf | Spherical/Conical | ASTM E18, ISO 6508, DIN 50103 |
| Rockwell B (HRB) | Softer metals, Aluminum alloys, Non-hardened steels | Suitable for softer materials, fast | Limited for very hard materials | Quality control, non-hardened metals | 10-100 kgf | Spherical (Steel Ball) | ASTM E18, ISO 6508 |
| Brinell | Metals (e.g., Steel, Aluminum), Castings | Large indenter for average hardness | Not suitable for very hard materials, large indentations | Large parts, castings, forgings | 500-3000 kgf, 500-1000 kgf (for Aluminum) | Spherical (Steel/Tungsten) | ASTM E10, ISO 6506 |
| Vickers | All materials, especially thin sections and coatings | High precision, small indentation | Slower process, more expensive equipment | Microhardness, thin films, small parts | 1-100 kgf | Diamond Pyramid | ASTM E92, ISO 6507 |
| Knoop | Brittle materials, ceramics, thin coatings | Ideal for very small or thin samples, anisotropic materials | Complex to perform, not suitable for bulk properties | Ceramics, glass, coatings, small samples | 10-1000 gf | Asymmetrical Pyramid | ASTM E384, ISO 4545 |
| Leeb (Rebound) | Metals, Large parts | Portable, suitable for large parts | Lower precision, sensitive to surface conditions | On-site testing of large parts, rough surfaces | 5.5-74.5 mJ | Rebound | ASTM A956, ISO 16859 |
*The unit “kgf” stands for kilogram-force. It is a unit of force defined as the force exerted by one kilogram of mass in a gravitational field with a standard acceleration due to gravity (9.80665 m/s²). In the context of hardness testing, “kgf” is used to specify the load applied to the indenter. For example, a load of 10 kgf means a force equivalent to 10 kilograms is applied.
Hardness Testing Conversion Table
The values below are estimated based on widely accepted conversion references such as ASTM E140, which provides guidelines for converting hardness numbers between various scales like Rockwell, Brinell, and Vickers. The exact values can vary slightly depending on the material and specific testing conditions. If a number falls between two hardness values, simply interpolate results to obtain an estimate.
A conversion table is particularly useful to provide a standardised way to compare results from different tests, ensuring consistency across different testing methods and industries (the data provided below is an approximation).
| Rockwell (HRC) | Rockwell (HRA) | Rockwell (HRB) | Brinell (HB) | Vickers (HV) | Knoop (HK) | Leeb (HL) |
| – | 37 | 55 | 95 | 100 | 111 | 287 |
| – | 42 | 64 | 107 | 113 | 127 | 350 |
| – | 44 | 70 | 121 | 127 | 139 | 390 |
| – | 47 | 75 | 135 | 137 | 150 | 397 |
| 0 | 50 | 81 | 149 | 149 | 167 | 417 |
| 5 | 55 | 86 | 166 | 168 | 184 | 437 |
| 10 | 57 | 89 | 180 | 180 | 196 | 455 |
| 15 | 59 | 93 | 199 | 199 | 216 | 478 |
| 20 | 61 | 100 | 255 | 258 | 258 | 500 |
| 25 | 62 | 103 | 277 | 290 | 290 | 530 |
| 30 | 63 | 105 | 302 | 324 | 324 | 550 |
| 35 | 64 | 108 | 327 | 358 | 358 | 570 |
| 40 | 65 | 110 | 352 | 395 | 395 | 590 |
| 45 | 66 | 113 | 381 | 436 | 436 | 610 |
| 50 | 67 | 115 | 411 | 477 | 477 | 630 |
| 55 | 68 | 118 | 444 | 520 | 520 | 650 |
| 60 | 69 | 120 | 477 | 566 | 566 | 670 |
| 65 | 70 | 123 | 512 | 613 | 613 | 690 |
| 70 | 71 | 125 | 550 | 661 | 661 | 710 |
| 75 | 72 | 128 | 590 | 712 | 712 | 730 |
| 80 | 73 | 130 | 634 | 764 | 764 | 750 |
Selecting the Best Hardness Testing Method for Your Application
The following table provides an overview of various materials, including metals, along with the corresponding hardness testing methods applicable to each. The table categorises materials based on their ability to undergo specific hardness tests, such as Rockwell, Brinell, Vickers, and others.
This concise breakdown aids in selecting the appropriate testing method for different materials, ensuring accurate and reliable measurements.
Although this table only represents metal hardness testing, polymers and elastomers can also be tested using slightly different testing methods (e.g. Shore hardness).
Rockwell Hardness Test
The Rockwell hardness test is a widely used method for determining material hardness, especially in high-volume testing environments, due to its speed, simplicity, and efficiency. It provides direct hardness readings without the need for additional calculations, making it ideal for routine quality control.
The Rockwell test is particularly suited for harder materials like steels and alloys, where smaller indentations and the precision of measuring indentation depth offer reliable results. It also requires less operator skill and reduces the likelihood of human error compared to other methods, such as Brinell, making it a preferred choice in production settings where speed and ease of use are crucial.
Rockwell Hardness Scales
| Hardness Scale | Application | Typical Load |
| Rockwell A (HRA) | Thin steel and carbide | 60 kgf |
| Rockwell B (HRB) | Softer metals like copper alloys, aluminum, and soft steels | 100 kgf |
| Rockwell C (HRC) | Harder materials like hardened steel and titanium alloys | 150 kgf |
Rockwell Methodology
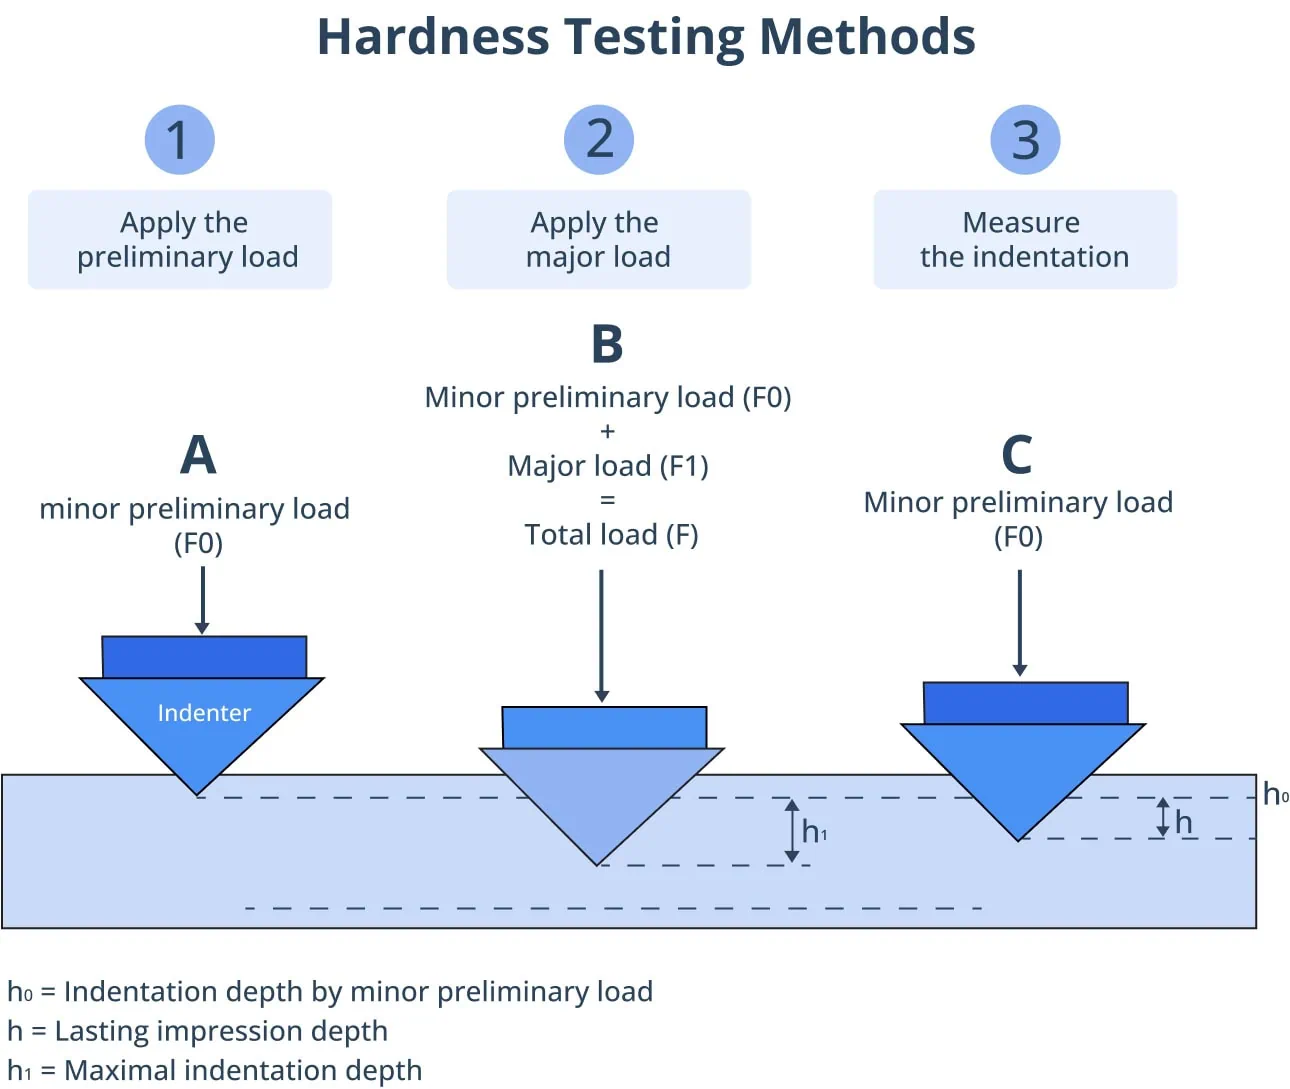
The Rockwell hardness test involves applying a sequence of loads to the material and measuring the depth of the resulting indentation, which indicates the material’s hardness. Here’s a step-by-step of the process:
- Apply preliminary load
- Start by applying a minor load of 10 kgf to the material.
- This initial load helps establish a consistent starting point and eliminates surface irregularities.
- Stabilise the load
- Allow the minor load to stabilise, ensuring that the indenter is correctly positioned on the material.
- Apply major load
- Once the minor load is stable, apply the major load.
- The major load can range from 60 to 150 kgf, depending on the specific Rockwell scale being used.
- This load creates a deeper indentation in the material.
- Hold the load
- Maintain the major load for a predetermined amount of time.
- This allows the material to respond fully to the applied force.
- Remove major load
- After the required time has passed, remove the major load while keeping the minor load in place.
- Measure the indentation
- Measure the depth of the final indentation relative to the initial minor load position.
- The measurement is recorded in 0.002 mm units.
The Rockwell hardness number, automatically calculated by the testing machine, reflects this depth—higher values indicate harder materials with shallower indentations, while lower values correspond to softer materials with deeper indentations.
Troubleshooting
- Surface preparation: Ensure the test surface is clean, smooth, and free of coatings or contaminants that can affect the indentation.
- Calibration: Regularly calibrate the tester and check for any mechanical issues with the indenter or loading system.
- Proper loading: Verify that both preliminary and major loads are applied correctly, avoiding excessive force that can cause surface damage or underloading that results in inaccurate readings.
Brinell Hardness Test
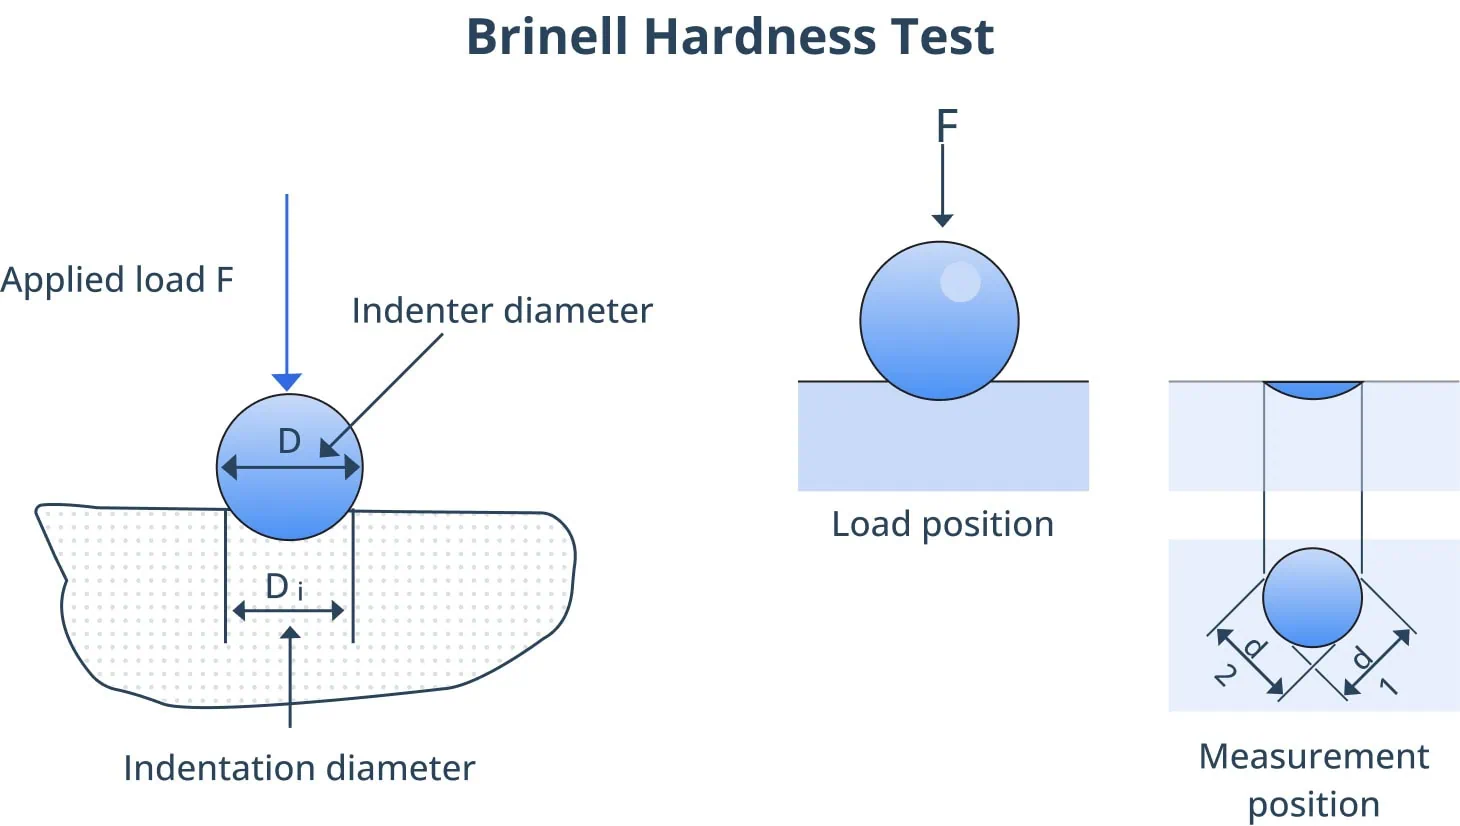
The Brinell hardness test is ideal for measuring the hardness of metals with coarse or inhomogeneous grain structures, such as cast iron and softer metals like aluminum alloys. It measures the diameter of a larger indentation, which averages out variations in the material’s microstructure, providing a more representative hardness value for materials with non-uniform properties.
Brinell is particularly useful for testing softer materials or when a larger indentation area is needed for analysis. In contrast, Rockwell testing is better suited for harder materials and scenarios requiring quick, direct readouts, but may be less accurate for materials with varying microstructures.
Brinell Hardness Scales
| Material | Brinell Hardness Number (HBW) | Typical Load |
| Nitrided surface | 750 | 3,000 kgf |
| White cast iron | 415 | 3,000 kgf |
| Hard metals (general) | 160 – 600 | 3,000 kgf |
| Annealed chisel steel | 235 | 1,500 kgf |
| Mild steel | 130 | 1,500 kgf |
| Medium-hard metals (general) | 80 – 300 | 1,500 kgf |
| Soft brass | 60 | 500 kgf |
| Soft metals (general) | 26 – 100 | 500 kgf |
Methodology
The Brinell hardness test measures material hardness by determining the diameter of an indentation made by a hardened steel or carbide ball under a specific load. A load, typically ranging from 500 to 3,000 kgf, is applied to the material’s surface for 10-15 seconds, allowing the ball to penetrate and create an indentation.
After the load is removed, the diameter of the indentation is measured using a microscope. The Brinell hardness number is calculated based on the load applied and the surface area of the indentation, with larger diameters indicating softer materials and smaller diameters indicating harder materials.
Troubleshooting
- Correct force application: Ensure that the correct force is applied for the material being tested, as too much or too little force can cause incorrect indentation shapes.
- Material homogeneity: Check for material uniformity; inhomogeneous materials can lead to irregular indentations.
- Accurate measurement: Use proper magnification and lighting to accurately measure the indentation diameter, and avoid parallax errors by ensuring the measurement is taken directly over the indentation.
Vickers Hardness Test
The Vickers hardness test is a versatile and precise method suitable for a wide range of materials, from soft metals to hard ceramics, and is especially valuable for micro hardness testing requiring small, accurate measurements. It uses a diamond pyramid indenter, creating a consistent indentation regardless of material hardness, which ensures highly accurate results.
Unlike the Brinell test, suited for materials with coarse grain structures, or the Rockwell test, ideal for quick, high-volume testing, the Vickers method excels in testing very small or thin specimens and provides detailed microhardness data. This makes it particularly useful in research, material science, and applications requiring fine detail and precision.
Vickers Hardness Scales
HV (Vickers Hardness Number) testing can be performed under loads ranging from 1 gf to 100 kgf. The versatility in load range allows it to be used for micro to macro hardness testing.
Methodology
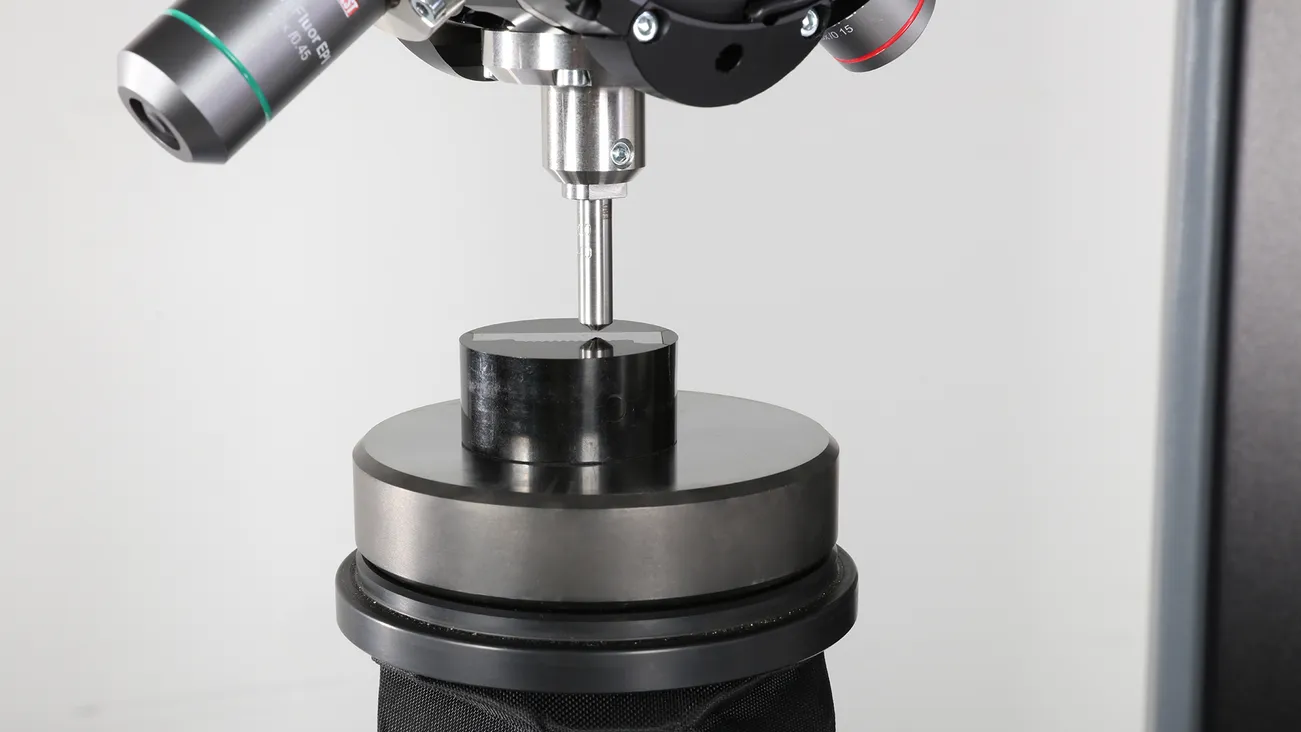
The Vickers hardness test measures material hardness by determining the size of an indentation made by a diamond pyramid-shaped indenter under a specific load. A load ranging from 1 gf to 100 kgf is applied to the material’s surface, creating a square-shaped indentation. After the load is removed, the diagonals of the indentation are measured using a microscope.
The HV is calculated based on the applied load and the area of the indentation. Smaller indentations indicate harder materials, while larger indentations indicate softer materials, with the test being particularly useful for precise hardness measurements across a wide range of materials.
Knoop Hardness Test
The Knoop hardness test is a microhardness test designed for brittle materials like ceramics and glass, as well as for small or thin metal sections. It uses an elongated diamond-shaped indenter to create a shallow, narrow indentation, ideal for measuring hardness on thin layers or coatings at a micro scale without causing excessive damage.
The Knoop test is particularly suited for very brittle materials or applications requiring precise hardness measurements in small areas, such as the cross-sections of coatings, microstructures, or very thin films, where deeper indentations from the Vickers test might cause cracking or fracture.
Knoop Hardness Scales
Knoop Hardness Number (HK) tests can be performed with loads ranging from 10 gf to 1,000 gf, allowing for detailed hardness analysis of brittle materials and thin coatings.
Methodology
The Knoop test measures material hardness by determining the length of an indentation made by an elongated diamond-shaped indenter under a light load. The load, typically ranging from 10 gf to 1,000 gf, is applied to the material’s surface, creating a small, elongated indentation. After the load is removed, the length of the indentation’s long diagonal is measured using a microscope.
The Knoop hardness number (HK) is calculated based on the load and the area of the indentation, with longer indentations indicating softer materials and shorter indentations indicating harder materials. This test is particularly suited for brittle materials and thin coatings.
Troubleshooting
- Indenter alignment: Verify that the indenter is properly aligned with the test surface to avoid skewed or off-center indentations.
- High magnification: Use high magnification for measuring small indentations, especially in Knoop tests, to ensure precise measurement.
- Consistent loading: Ensure that the loading process is gradual and consistent to prevent variations in indentation size and hardness readings.
Leeb Hardness Test
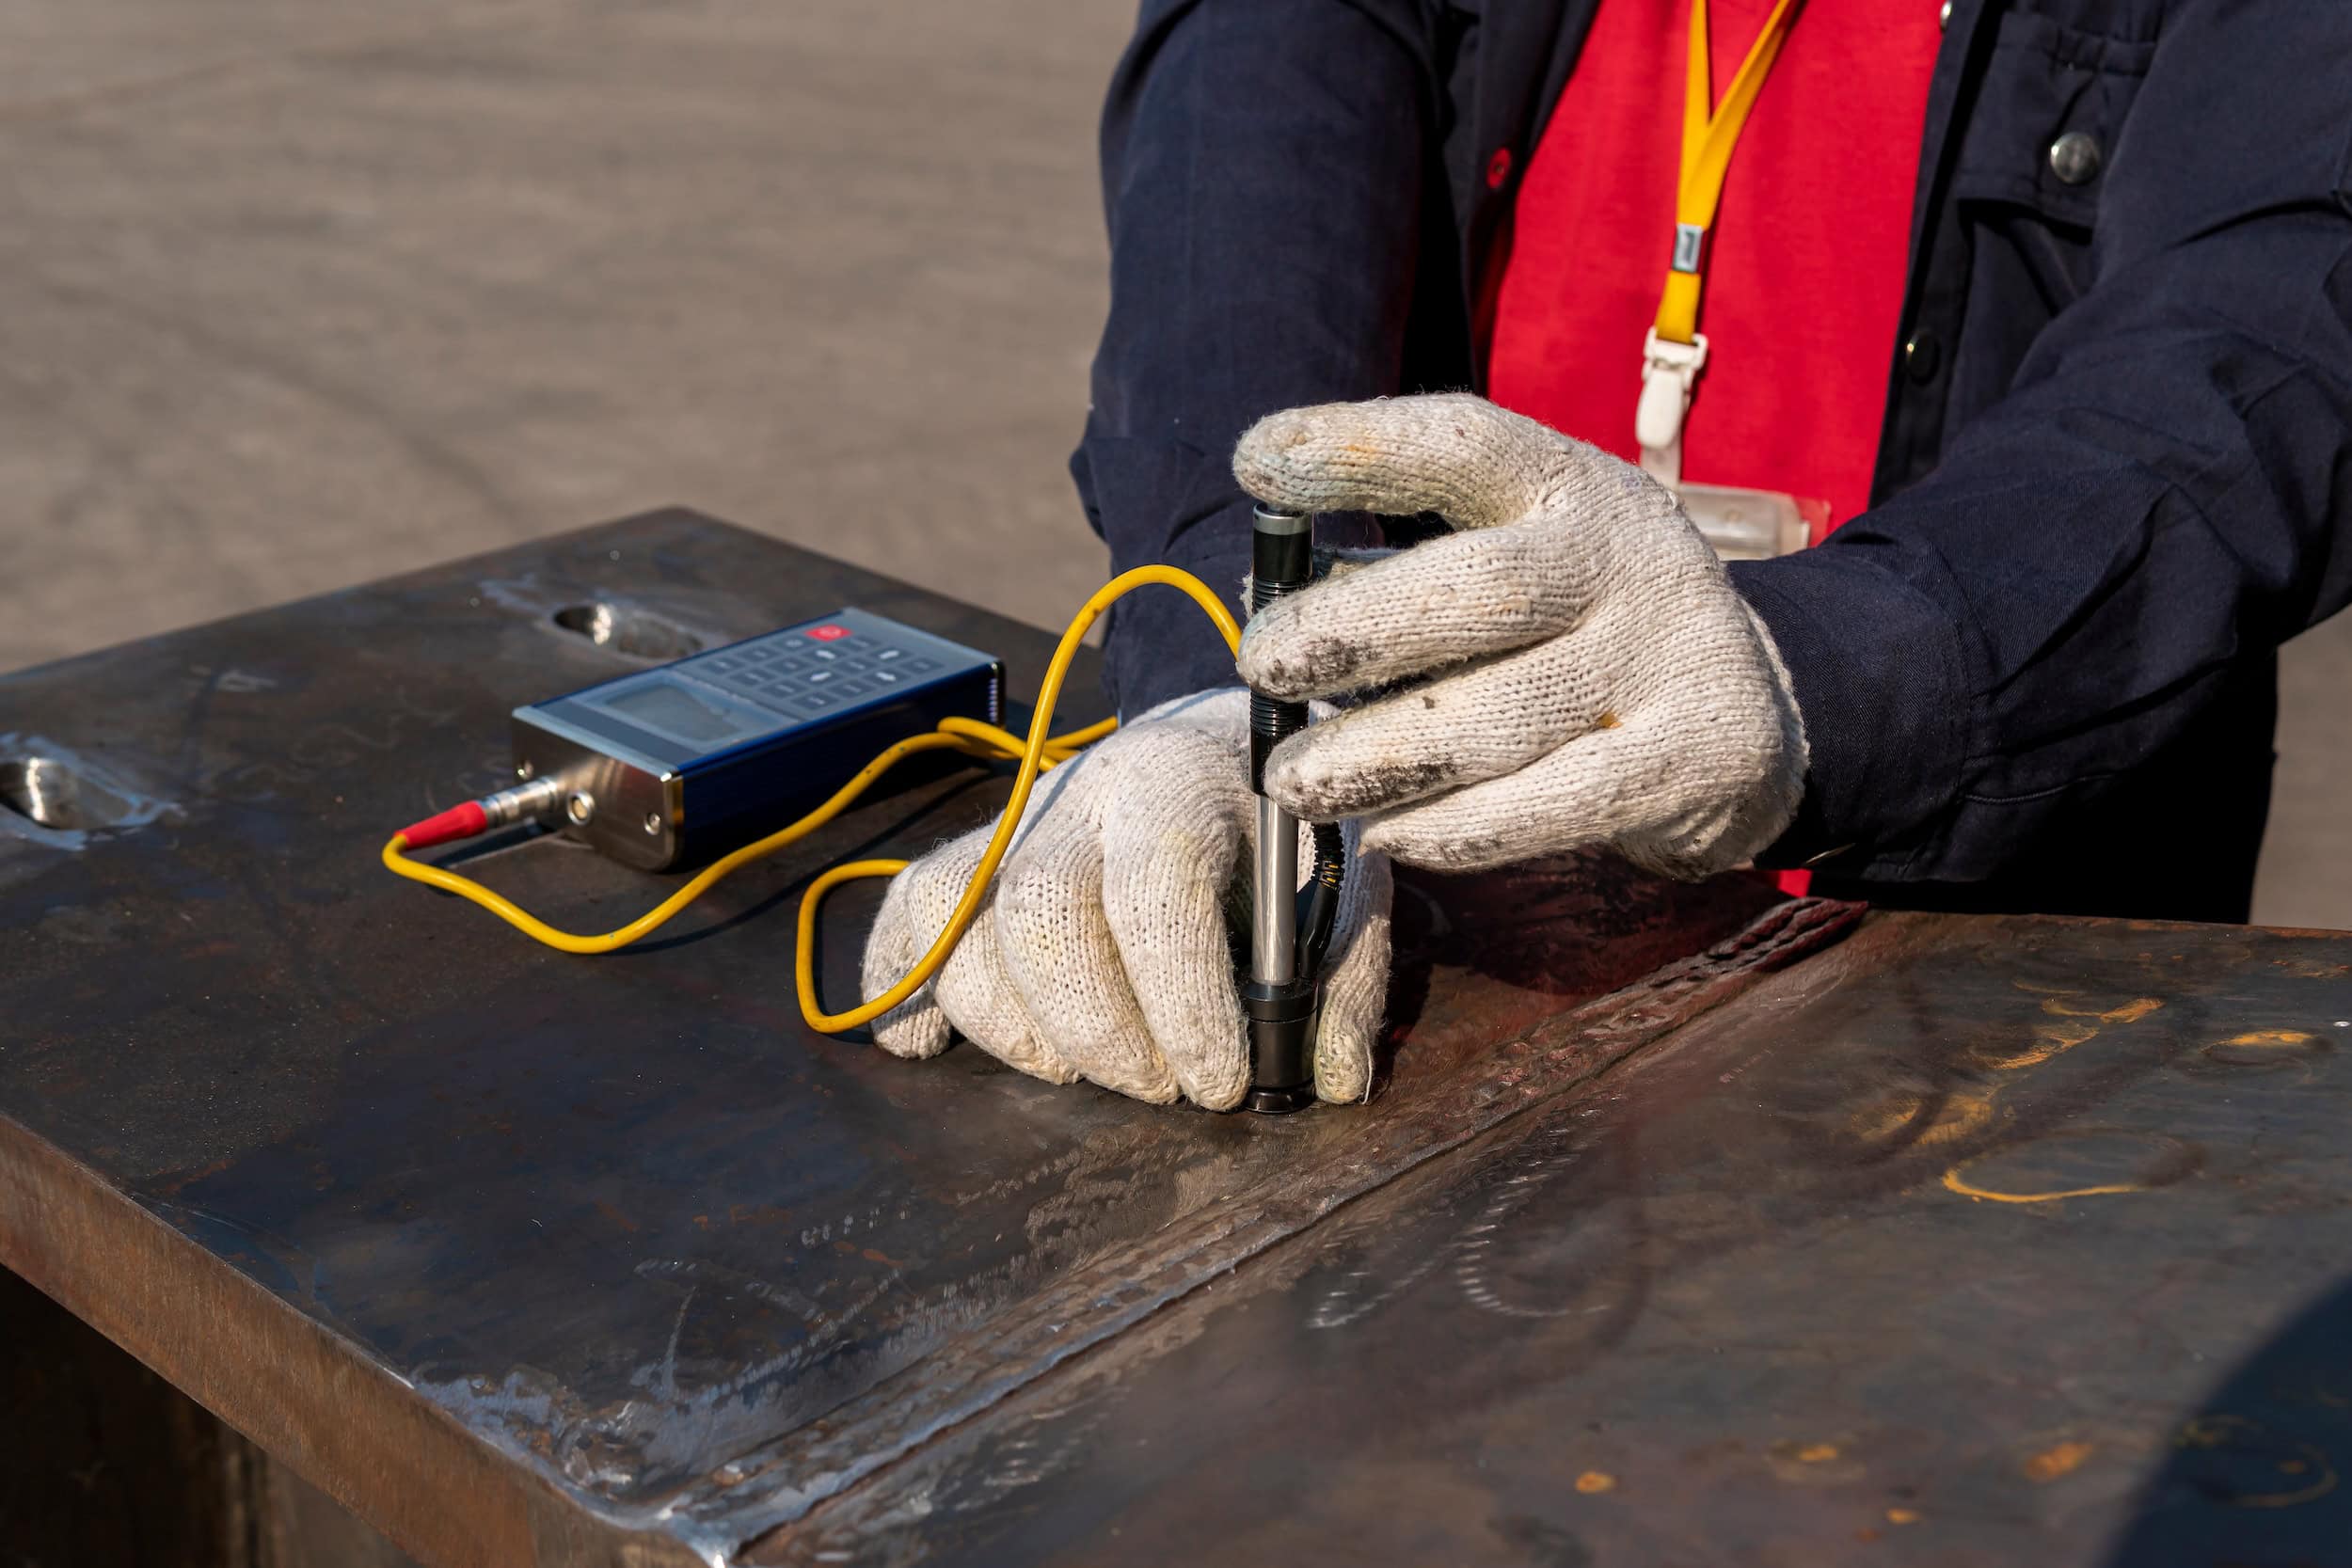
The Leeb Hardness Test, also known as the rebound hardness test, measures hardness by analysing the rebound of an indenter, rather than the size of an indentation. It is portable and ideal for on-site testing of large and heavy components, offering a non-destructive method that causes minimal damage to finished parts and coatings.
The Leeb test is versatile, accommodating various materials and hardness levels with different probes and impact energies. It provides quick, direct hardness readings with minimal setup and operator skill, making it efficient for applications requiring speed, ease of use, and field testing capabilities.
Probe Types
Leeb Hardness Number (HL) tests can be conducted under various impact energies, typically ranging from 5.5 mJ (D type probe) to 74.5 mJ (G type probe) depending on the probe used.
| Probe Type | Impact Energy (mJ) | Application |
| A-Type | 5.5 | Primarily used for softer materials and some plastics, providing a lower impact energy |
| B-Type | 40 | For materials with medium to hard hardness ranges, offering a higher impact energy |
| C-Type | 20 | Medium-hard materials (e.g., medium-hard steels, alloys) |
| D-Type | 9.8 | Soft to medium-hard materials (e.g., aluminum alloys, copper) |
| E-Type | 0.6 | Very thin materials or small parts (e.g., thin coatings, microhardness testing) |
| F-Type | 30 | Intermediate hardness materials (e.g., materials between soft and hard) |
| G-Type | 74.5 | Very hard materials (e.g., hardened steels, high-strength alloys) |
| H-Type | 10 | High hardness materials and various alloys and metals |
| N-Type | 15 | Normal impact energy for general-purpose testing, suitable for a wide range of materials |
Methodology
The Leeb hardness test measures material hardness by determining the rebound velocity of a tungsten carbide ball after it impacts the material’s surface under a specific impact energy. The test typically uses a probe that delivers an impact energy ranging from 9.8 mJ to 74.5 mJ, depending on the probe type.
After the ball strikes the material, the rebound velocity is measured, and the HL is calculated based on the ratio of rebound to impact velocity. A higher rebound velocity indicates a harder material, while a lower rebound velocity indicates a softer material. This test is portable and ideal for testing large, heavy components on-site.
Troubleshooting
- Probe selection: Choose the appropriate probe type and impact energy for the material being tested to ensure accurate results.
- Surface preparation: The surface should be smooth and free of debris; rough or dirty surfaces can cause energy loss during impact, leading to inaccurate readings.
- Angle of impact: Ensure the impact is perpendicular to the surface to prevent skewed results.
Ensuring Accurate and Reliable Hardness Testing Results
To ensure accurate and reliable hardness values during testing, consider the following general tips:
- Sample preparation: Ensure that the sample surface is properly prepared, free of contaminants, and has a smooth, flat surface. Inconsistent surface conditions can lead to inaccurate measurements.
- Correct load application: Verify that the appropriate load is selected for the material being tested. Using incorrect loads can cause indentations that are too shallow or too deep, leading to erroneous results.
- Proper calibration: Regularly calibrate the hardness testing machine with certified reference materials. Calibration helps in maintaining the accuracy of the measurements over time.
- Indenter condition: Inspect the indenter regularly for wear and tear. A worn or damaged indenter can produce inconsistent results and should be replaced immediately.
- Alignment: Ensure that the indenter is properly aligned with the sample. Misalignment can cause uneven pressure distribution, leading to skewed results.
- Environmental conditions: Control the testing environment, particularly temperature and humidity, as they can influence the material properties and test results.
- Avoid vibrations: Position the hardness tester on a stable surface to avoid vibrations, which can interfere with the indentation process and affect measurement accuracy.
- Consistent indentation time: Follow the recommended indentation time for each hardness test. Variations in timing can alter the size of the indentation and thus the hardness value.
Hardness Testing Results for Reliable Material Performance
Hardness testing is a fundamental practice in materials science and engineering, providing crucial insights into a material’s resistance to deformation and its overall durability. By understanding the differences among various hardness testing methods, you can select the right hardness test method for a specific metal, leading to more informed material choices and better performance in real-world applications.
 Europe
  Türkiye













Comment(1)