CNC machining is a versatile and precise manufacturing process capable of producing components with a wide range of complexity and sizes using various materials. However, it does come with size limitations dictated by various factors. Awareness of these constraints is crucial for optimising designs and ensuring that designs can be manufactured.
General Size Limitations of CNC Machining
This section highlights several design tips and considerations that could improve part manufacturability while optimising cost and lead time. It discusses part complexity and CNC manufacturing constraints such as fillets, holes, pockets, threads, and undercuts.
Material Blank Size
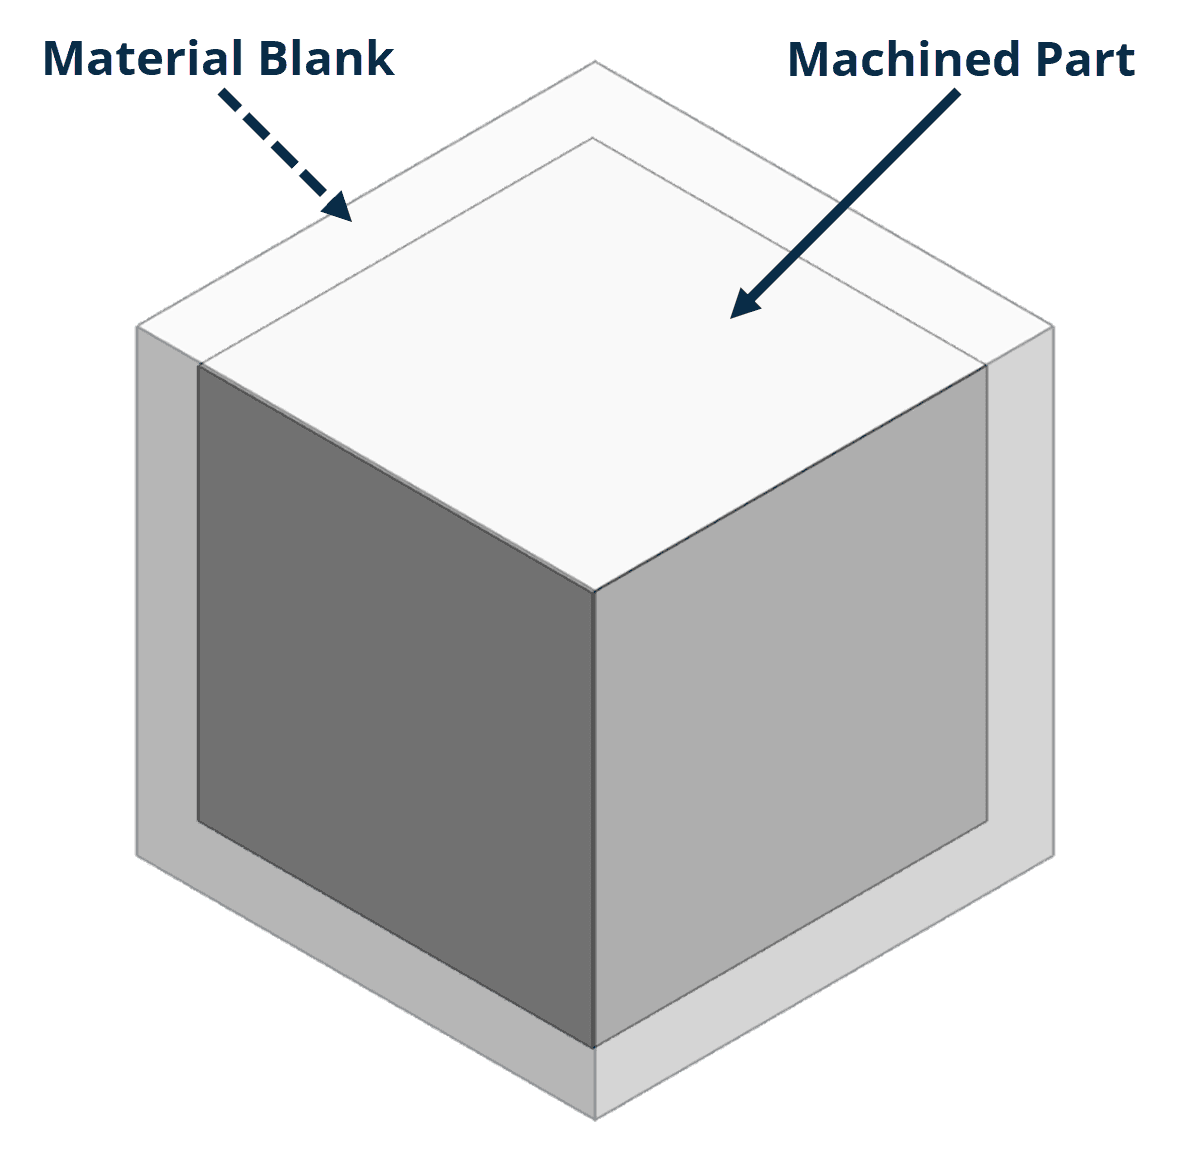
This refers to the size of the raw material used to create the finished part. Material blanks typically need to be slightly larger than the finished part’s measurements to allow for variations and to cut away rough faces of the raw material.
For example, if the final dimensions are to be 50 x 50 x 50 mm, then a suitable material blank would be roughly 53 x 53 x 53 mm. When designing, take this into consideration by adding additional X, Y, and Z dimensions to your part and matching it to the part size limits below.
Limitation for Milled, Lathe and Drilled Parts
| Part/Feature | CNC Milling | CNC Turning | CNC Drilling |
| Maximum size | The largest CNC milling machines, like the SNK HF-7VM vertical gantry mill, have a pallet size of 3500 mm by 10000 mm, with X-axis travel of 11000 mm, Y-axis travel of 4700 mm, and Z-axis travel of 2450 mm. | The largest CNC turning centres, such as the SL 603, can handle parts with diameters up to 930 mm and lengths up to 4000 mm. | The largest CNC drilling machines, like the Voortman V200, can handle plates up to 2400 mm in length, 1000 mm in width, and 60 mm in thickness, with a maximum weight of 600 kg. |
| Minimum size | Typically, the smallest feasible feature size is 0.5 mm. For practical purposes, machining features smaller than 2.5 mm in diameter is considered micro-machining and is generally avoided unless necessary. | The smallest practical diameter for turned parts is approximately 0.5 mm, with common practice starting from about 1 mm. | Standard practice for most drilling applications starts at 2.5 mm diameter for ease of production and accuracy. Although, the smallest standard drill bit size used is around 1 mm. For very small features, holes as small as 0.05 mm (50 micrometers) can be drilled, but this falls into the realm of micro-drilling, which requires specialised equipment and techniques. |
| Better alternatives for larger parts (than maximum) | • Injection molding (plastics) • Die casting, metal extrusion (metals) |
• Injection molding (plastics) • Forging, casting (metals) |
– |
| Better alternatives for smaller parts (than minimum) | • Injection molding, micro injection molding, 3D printing, micro machining (plastics) • Micro machining, electroforming, laser cutting, micro EDM, metal injection molding (metals) |
• Injection molding, micro injection molding, 3D printing, micro machining (plastics) • Micro machining, electroforming, laser cutting, micro EDM, metal injection molding (metals) |
– |
Feature Size Limitations: Reference Chart
The following chart summarises the design guidelines associated with various features that can be made using CNC. Its purpose is to help designers optimise components for manufacturability.
Size Limitations for Post-Processing
The different post processing operations that can be carried out on a part depend on the size of the part. For example, larger parts often do not fit in media-blasting cabinets, therefore such parts cannot be blasted. Another example is that custom racking may be required for parts larger than 3 meters that need to be anodized, electroplated or powder coated.
| Process | Maximum part size | Notes |
| CNC Turning | Diameter up to 500 mm and length up to 4500 mm | Xometry uses specialized tooling, including standard 2-axis lathes, live tooling systems, multi-spindle machines, and Swiss lathes, to produce parts with milled or intricate features. |
| CNC Milling | Xometry’s partner network can typically mill parts up to X-2000 mm, Y-750 mm, and Z-600 mm. | If your part exceeds 600 mm in machinable height, it will require specialized tooling and an additional manual review for manufacturability. |
| CNC Drilling | Equipment includes upright, bench, and radial drill presses, enabling Xometry to drill holes up to 7 cm in diameter in simple and complex patterns. | The complexity of the drilling pattern and material may affect lead times and costs. |
General Manufacturing Standards
Unless otherwise specified, Xometry manufactures CNC-machined components to the following standards:
- Surface Finish: The as-machined surface finish is Ra 3.2 or better, with CNC machine tool marks possibly leaving a swirl-like pattern.
- Edge Treatment: Sharp edges will be broken and deburred by default. If critical edges need to remain sharp, this should be noted and specified on the CAD drawing.
- Plastic Components: Clear or transparent plastics will have a matte finish or translucent swirl marks on any machined face. Bead blasting will result in a frosted finish on clear plastics.
- Tolerances: Tolerances on foam or similar compressible materials cannot be guaranteed.
General Tolerances
Unless specifically specified by the designer, Xometry will adhere to the industry standard ISO 2768 and ISO 286 tolerances listed below:
General tolerances for CNC machining start at ±0.1 mm. Tighter tolerances, defined as smaller than the general standard, can be achieved with CNC machining, reaching up to ±0.01 mm.
Specialized setups and additional operations like reaming and grinding can allow for even tighter tolerances depending on the material and part geometry. Geometric tolerances (GD&T) can be applied to the drawing, but these may increase inspection times due to the necessary tools and time for checking.
While tighter tolerances improve a part’s form, fit, and function, they have drawbacks. They can lead to higher scrap rates, additional fixturing, special measurement tools, and longer cycle times from slower cutting speeds. These factors can increase pricing and lead times. Depending on the tolerance and geometry, the part cost can more than double compared to a standard tolerance.
General Size Limitations of CNC Machines
The physical dimensions of CNC machines’ work envelopes are the main factor limiting their part size capabilities. This constraint affects all types of CNC machines, including turning, milling, and drilling. Other limiting factors include the machine’s axis travel and the number of axes.
CNC Machining Work Envelope
The CNC machining work envelope refers to the 3D space within which the machine operates. Different machines each have their own work envelope, which limits the size of components that can be manufactured using the machine.
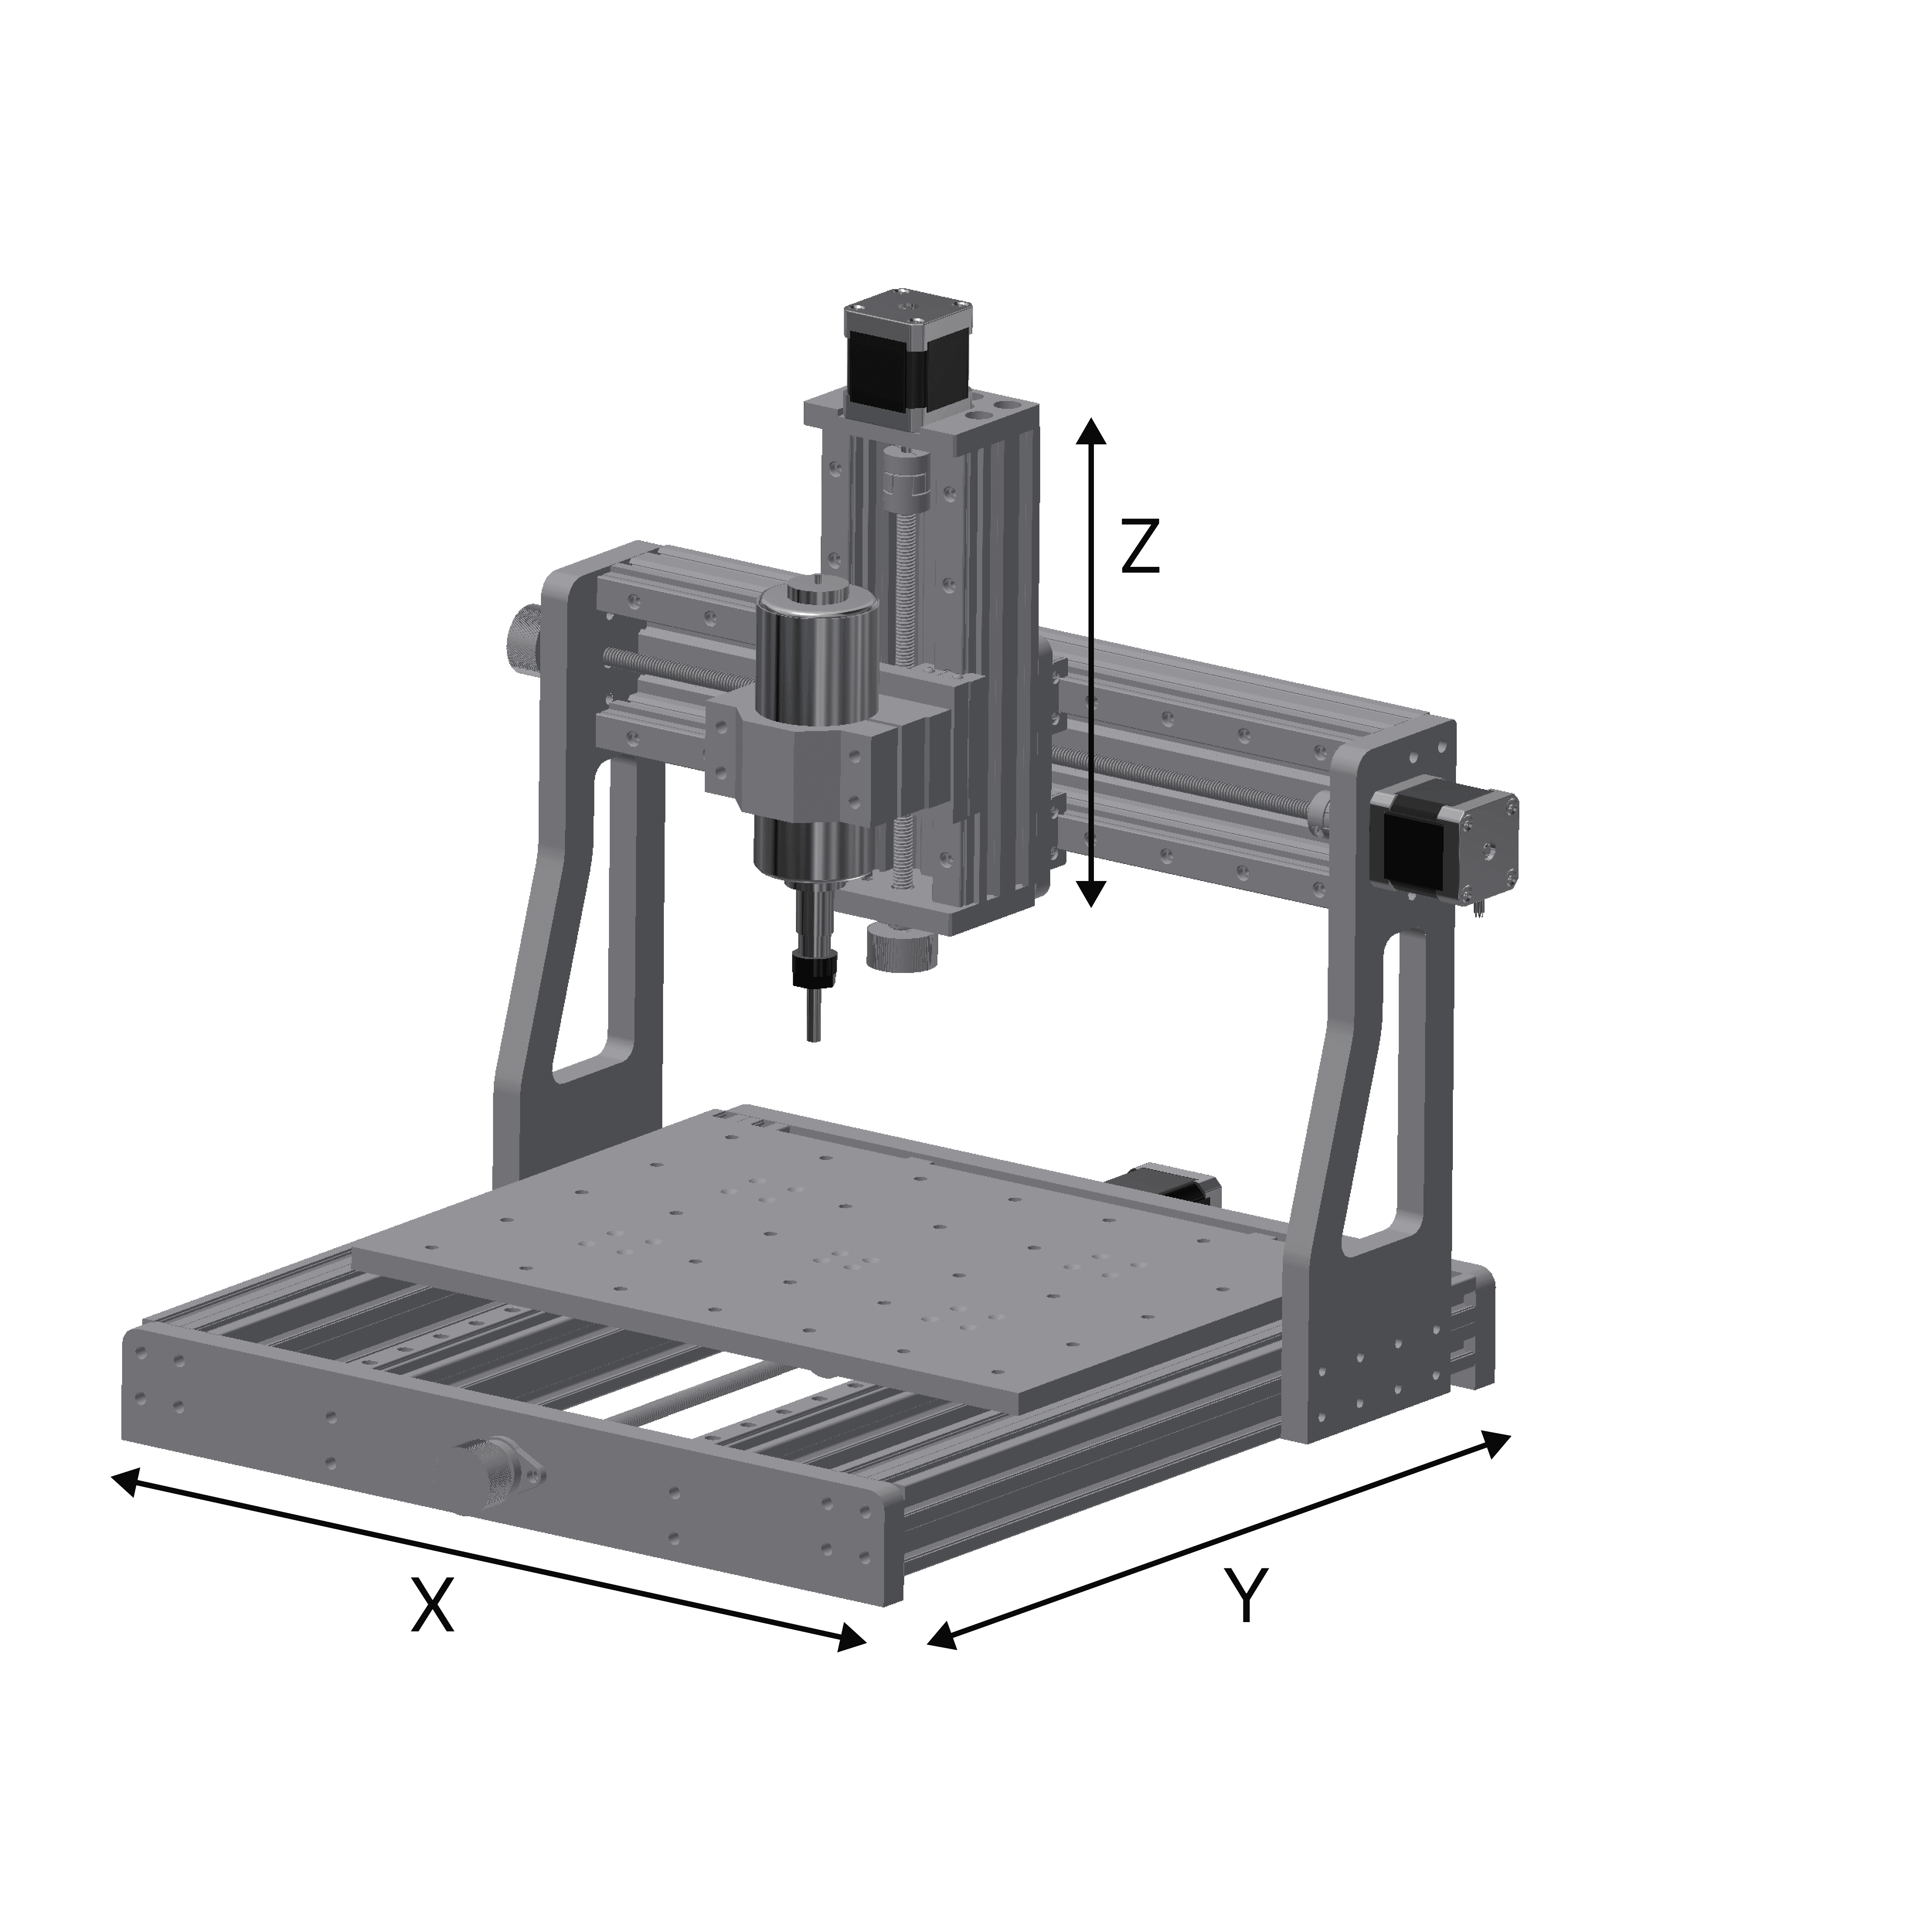
The physical size of the machine, and more specifically, the X, Y, and Z directions in which the machine can move, dictates the work envelope.
However, it is important to note that when designing components, the work envelope might be reduced due to tooling size. For example, as shown above, if the cutting bit were longer, the CNC work envelope would be smaller in the Z direction.
CNC Axis Travel
CNC axis travel is the range over which the cutting tool or workpiece can move along the X, Y, and Z axes. This has a direct impact on the size of components that can be machined. Below is an example of a 3-axis CNC milling machine. In this case, the rail lengths dictate the distances the machining bit can move in each direction.
CNC Axis Types
CNC machines typically operate within 3 to 5 axes. Three-axis CNC machines move the cutting tool along the X, Y, and Z axes. Four-axis CNC machines add an additional rotation axis, which increases the complexity of the parts that can be manufactured.
Finally, five-axis CNC machines add two additional rotation axes to the X, Y, and Z movements. The number of axes significantly affects the size and complexity of components that can be manufactured.
CNC Turning Size Limitations
CNC turning involves a rotating workpiece, while a single-point cutting tool removes material. The physical geometry of a CNC lathe dictates the size limitations. CNC turning machines are constrained by their centre distance, swing distances, and how the workpiece is mounted.
Distance Between Centres
For a CNC Lathe, the distance between centres refers to the distance between the lathe headstock and tailstock. This limits the total maximum machinable length of the component that can be machined.
Swing Over Bed, Cross Slide, and Gap
The terms “Swing Over Bed,” “Swing Over Cross Slide,” and “Swing Over Gap” define different clearance measurements on a lathe. Swing Over Bed indicates the maximum diameter that can be machined over the bed’s longitudinal guideway.
“Swing Over Cross Slide” is the diameter allowance over the cross slide, which is smaller than the Swing Over Bed. “Swing Over Gap” indicates a small gap allowing larger diameter parts, such as flanges, to be machined.
These different swing parameters affect the CNC turning diameter limits and the component length. Here’s a more detailed description:
- Swing Over Bed: The Swing Over Bed parameter represents the absolute maximum diameter of the workpiece that can be mounted. It is also important to note that the workpiece should be slightly smaller than the swing over the bed.
- Swing Over Cross Slide: The Swing Over Cross Slide is the maximum diameter of a workpiece that can be machined when the cross slide (the part of the lathe that holds the tool post) is considered. The Swing Over Cross Slide is the limiting factor determining the maximum diameter of a part that can be machined using the full travel of the cross slide. For example, if a 200 mm diameter steel shaft is mounted in the lathe and you want to machine the centre of the shaft to a 100 mm diameter, your Swing Over Cross Slide will need to be large enough to accommodate the 200 mm. If the Swing Over Cross Slide is smaller than 200 mm, the cross slide will likely collide with the shaft. So even if the Swing Over Bed allows for a 200 mm shaft, if the Swing Over Cross Slide does not allow for 200 mm, the shaft, in this example, cannot be machined.
- Swing Over Gap: The Swing Over Gap enables workpieces of larger diameters but significantly limits the length of the component and the angles at which the tool can cut. This can be achieved in some CNC machines by removing a gap block on the lathe bed. However, one should note that this differs from machine to machine and that not all CNC machines have this possibility. The Swing Over Gap enables workpieces of larger diameters but significantly limits the length of the component and the angles at which the tool can cut. This can be achieved in some CNC machines by removing a gap block on the lathe bed. However, one should note that this differs from machine to machine and that not all CNC machines have this possibility.
Mounting Method of the Workpiece
In typical CNC lathe operations, the workpiece is secured in the headstock and supported by the tailstock. However, for certain tasks, the workpiece is only mounted in the headstock. In these cases, the material type and thickness determine the allowable length of the workpiece, as excessive length can cause flexing and potential issues.
CNC Milling Size Limitations
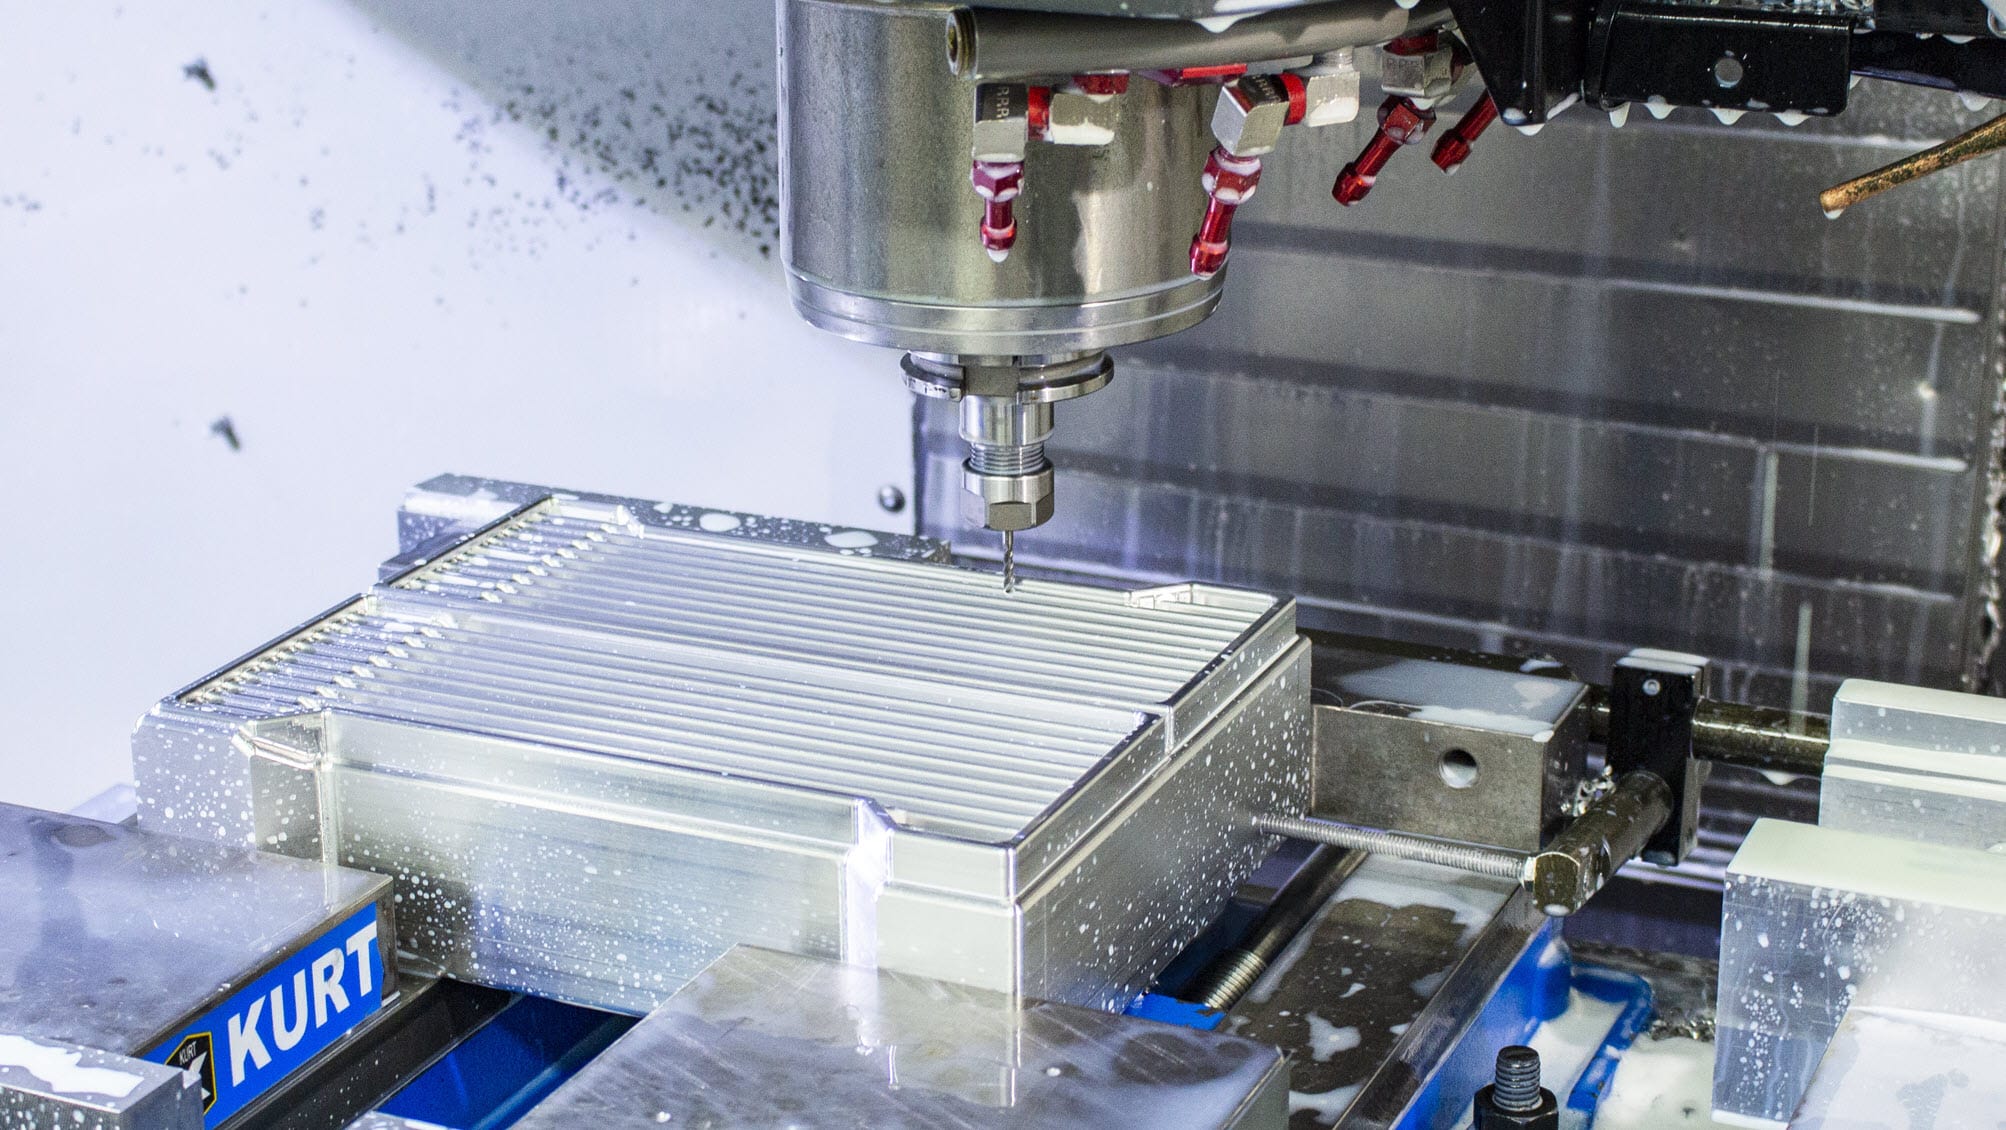
CNC milling machines use rotating cutting tool to remove material from a workpiece. Milling machine size limitations are dictated by the CNC machining work envelope and tool reach.
CNC Machining Work Envelope
The physical size of the milling machine table (X and Y) and the maximum axis (Z) travel limit the size of the workpiece. One should note that the work envelope does not denote the exact maximum size of the workpiece, and the workpiece might be further limited by the tooling.
Tool Reach
The length of the cutting tool and the ability to reach different areas without interference places a size limitation on the workpiece. For example, deep features in the part could typically be limited by the tool length rather than the travel of the tool.
To further illustrate this, if you were to have a part with narrow grooves, as in the image below, the tool length would be the limiting factor as the tool holder would not be able to move past the top face of the component, should the depth of the grooves surpass the length of the tool.
In terms of accuracy, machines produced by Kern Microtechnik can achieve tolerances as tight as ±2 microns (±0.00007 inches).
CNC Drilling Size Limitations
CNC drilling is used to create holes in a workpiece, and the size limitations are primarily influenced by the machine’s Z-axis travel and the length of the drill bits. Thus, it is important to ensure that the drill bit length and axis travel surpass the thickness/height of the workpiece that needs to be drilled. Another size limit is the bed size of the CNC drilling machine, which dictates the maximum length and width of the workpiece that can be drilled.
Get Your Parts CNC Machined Today
Understanding the size limitations of the CNC machining process is essential for optimising your designs and ensuring successful manufacturing. With clear knowledge of the work envelope, axis travel, material considerations, and post-processing options, you can create parts that are well-suited for CNC machining. You’re now ready to design parts optimised for our partner network’s machine sizes. Get an instant CNC machining quote!
 Europe
  Türkiye
  United Kingdom
  Global

 Login with my Xometry account
  0
0










Comment(0)